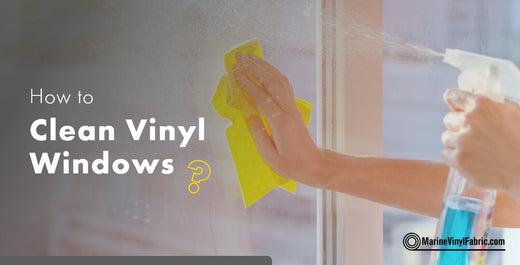
How to Clean Vinyl Windows
It is important to take proper care of your vinyl windows. This will help prolong the life of your windows and keep them looking nice.
Vinyl windows should be cleaned at least twice a year to keep them in good shape. When working with vinyl, using the right cleaners is probably the most important aspect of cleaning your windows. You want to use a mild cleaner on the vinyl. Use cleaners that are specifically made for vinyl otherwise, you can use dish soap or baby soap to get the job done. You’ll want to avoid harsh cleaners because they can cause irreparable damage to the vinyl.
We’ll be going over the tools you’ll need, what products and tools to avoid, as well as the main steps you should follow when cleaning your vinyl windows.
Tools Needed to Clean Vinyl Windows
Most of the tools needed to clean your vinyl windows are simple tools that you can find right at home.
Here’s what you’ll need:
- Water
- Vacuum
- Soft brush or sponge
- Mild detergent/dish soap/ baby soap
- Soft towel
- Bucket
Products to Avoid when Cleaning Vinyl Windows
There are some products that you should definitely avoid when cleaning vinyl windows. These products can cause some damage to the vinyl.
Here are some tools and products to stay away from:
- Harsh household cleaners
- Bleach
- Pressure washer
Now let’s get into the steps to get those vinyl windows cleaned.
4+ Steps to Clean Vinyl Windows
Step #1 Take Down the Window
The first step is to get the window and all of the pieces ready to be cleaned. Remove the screen, window, and frame so that you can get started cleaning.
It’s important that you take apart the window as much as you can. Different parts of the window will need to be cleaned in different ways.
Step #2 Clean the Frame
Start with cleaning the frame. The biggest thing you’ll want to look for is cleaning up any dust and dirt that is on the frame. One of the easiest ways to do this is to use a soft brush. Simply brush the area to remove what you can from the frame. You likely won’t get everything with the brush alone.
After using the brush, it can be helpful to use a vacuum to get any excess dust or dirt that was missed. The suction will help get the areas that were missed with the brush.
Once you’ve removed all the dust and dirt, you can move on to cleaning the vinyl window itself.
Step #3 Wash the Window
The next and biggest step is actually cleaning the vinyl window itself. The best way to handle this is to wash the vinyl window in a very similar way as you would your car.
Get the window nice and wet before getting started. There are a couple of good ways to do this. You can use a hose on mist mode, which will gently apply water to the window. This is probably the quickest way to get the windows wet. Another way you could do this is to just dunk a sponge in water and apply it to the window from the sponge. This will take longer than the hose, but it’ll get the job done.
You could also dump the bucket of water on the window to get the window wet quicker. The only way to make a mistake with applying the water is by using too much pressure. Remember to avoid pressure washers when working with vinyl. This will put too much pressure on the window and can cause some damage. Once your window is wet, then you can apply the cleaner that you decided on.
As mentioned previously, this should be some form of a mild cleaner. It could be a cleaner that is specifically meant for vinyl, or it could be dish soap or baby soap.
Apply the cleaner to your sponge and softly rub the windows to cover the entire surface and clean the windows. You can go over the surface a few times to be sure you’re cleaning the area well.
Once you’ve used our cleaner and have cleaned the area well, you can rinse the windows so that they don’t have any leftover cleaner or soap. You can either dump water on the windows or use a hose on a light setting to rinse the windows.
Step #4 Dry the Window
Once you have the window all cleaned up, the next step is to dry the window. You’ll want to do this right after you’re done cleaning the window and get the area dried as soon as possible.
Getting the vinyl window dry right away will help avoid any water marks or stains from being left behind. This isn’t a huge deal but will have an impact on the appearance of the windows. It wouldn’t be a permanent issue, but would just require the windows to be washed again.
The best way to dry the window is to use a soft towel. This will help ensure that you don’t scratch or damage the vinyl. Once you get the window all dried, you’re almost done. The last step is to put everything back together.
Step #5 Reassemble the Window
Now that you have the frame cleaned off and the windows cleaned, you can put the window back up. It’s the last big piece before you’re good to go.
Double check to make sure you’ve assembled everything correctly and that you’ve secured the window in place. Once you’re sure everything is put back together correctly, then you’ve successfully cleaned your vinyl windows.

Vinyl Window Maintenance Made Easy
To maintain the vinyl windows in good condition, it is highly recommended to do deep cleaning twice each year.
While cleaning vinyl windows make sure you’re only using mild cleaners, dish soap, or baby soap. This is the best way to prevent any damage to your windows that some of the more harsh cleaners can cause. Products like bleach and regular household cleaners can cause stains and damage that cannot be repaired. The cleaning is completed in just four steps. This involves taking down the window followed by cleaning the frame, washing the window and finally drying the windows
If you need any personalized assistance do not hesitate to reach out to our expert at MarineVinylFabric.com. Connect with us directly at (800) 471-2092 or mail us at Support@MarineVinylFabric.com.





Leave a comment
This site is protected by hCaptcha and the hCaptcha Privacy Policy and Terms of Service apply.