


How to Install Marine Vinyl Boat Flooring Like a Pro

Old boat flooring needs an upgrade from time to time. Worn-out carpets and damaged surfaces can make a boat look shabby and reduce its value. Many boat owners face this common problem but hesitate to hire professionals due to high costs.
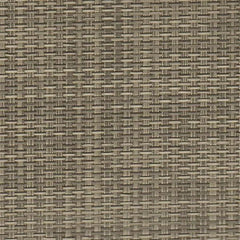
Marine vinyl flooring stands as the top choice for boat owners today. This durable material resists water damage, UV rays, and daily wear. The right tools and steps make DIY installation possible for any boat owner.
A proper DIY installation of marine vinyl flooring saves money and creates a custom look. This guide breaks down each step of the process, from surface prep to final touches. The right tools, materials, and methods ensure a professional finish that lasts for years.
Ready to transform that boat floor?
Key Takeaways
-
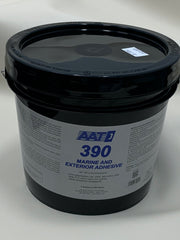
Marine vinyl flooring installation requires eight essential tools: drill, adhesive, razor knife, scraper, sander, straight edge, and staple gun, with AAT390 ($39.99/gallon) being a top adhesive choice.
-
The complete installation process follows eight key steps: measuring, removing old flooring, surface prep, cutting vinyl, applying adhesive, installation, smoothing bubbles, and adding trim.
-
Proper surface preparation through degreasing, sanding, and thorough cleaning creates the ideal foundation for long-lasting marine vinyl flooring that resists UV rays and water damage.
-
DIY installation saves significant costs while creating custom looks, but requires careful wire labeling, frequent blade changes, and consistent pressure during bubble removal for best results.
Tools and Materials Needed
A proper marine vinyl flooring installation needs specific tools and materials. The right equipment creates a smooth, professional finish that lasts for years.
Drill
A power drill serves as a vital tool for marine vinyl flooring installation. Professional installers need both cordless and corded drills with various drill bits to remove old components.
The drill helps remove screws, rivets, and other fasteners that secure existing floor coverings or trim pieces.
The right drill bits make quick work of disassembling boat components before vinyl installation begins. Most marine projects require multiple bit sizes to handle different screw types and mounting hardware.
Moving on to the next essential tool needed for marine vinyl installation - a quality adhesive creates a strong bond between surfaces.
Glue/Adhesive
Moving from drill selection to adhesive choice plays a vital role in marine vinyl installation success. Marine-grade adhesives create strong bonds between the vinyl flooring and boat surface. AAT390 is a premium choice at $39.99 per gallon, offering superior waterproof properties.
Professional installers must select adhesives based on the subfloor and the backing of the flooring being used. The right glue ensures long-lasting results against harsh marine environments. Always read and follow the adhesive manufactures specifications and recommendations regardless of the brand of adhesive you chose.
Razor Knife
A razor knife serves as a vital tool for marine vinyl flooring installation. Professional installers need this sharp cutting instrument to make precise cuts around corners, edges, and tight spaces.
The blade creates clean, straight lines through the vinyl material without tearing or damaging the surface.
The right razor knife makes boat flooring projects easier and more professional. Users must replace dull blades often to maintain cutting precision during vinyl flooring installation.
A sharp blade helps create exact fits around obstacles and ensures proper trimming along walls. The next crucial tool needed for installation includes a reliable scraper.
Scraper
A scraper works hand-in-hand with a razor knife for boat flooring projects. The scraper removes old glue and carpet residue from the boat's surface. This essential tool creates a clean base for new marine vinyl flooring installation.
Professional scrapers feature sharp metal edges that strip away stubborn materials quickly. The flat blade design helps users reach tight corners and edges during surface preparation.
Scrapers need regular cleaning to maintain their effectiveness throughout the DIY boat flooring project.
Sander
A high-speed air sander serves as a crucial tool for marine vinyl flooring installation. Professional sanders remove old adhesive residue and create the perfect surface texture for new vinyl application.
The tool's powerful motor strips away surface imperfections while maintaining control over the sanding process.
The right sander makes boat flooring preparation quick and efficient. Users need to select proper grit sandpaper based on surface conditions - coarse grits remove stubborn materials while fine grits create smooth finishes.
Electric sanders speed up the work compared to manual sanding methods and produce more consistent results across large deck areas.
Straight Edge
A straight edge serves as a vital tool for marine vinyl flooring installation. The metal ruler creates precise cutting lines across the vinyl material, leading to professional-looking results.
Proper cuts prevent waste and ensure each piece fits perfectly into the boat's floor space.
Professional installers rely on straight edges made from steel or aluminum to guide their razor knives. The tool must stay firmly in place during the cutting process to produce clean, accurate lines through the vinyl flooring.
Most experts recommend using a straight edge at least 48 inches long to handle larger sections of marine vinyl in a single cut.
Step-by-Step Installation Guide
The eight-step installation guide leads boat owners through a simple process to replace old boat flooring with new marine vinyl, from accurate measurements to the final trim work. As a note, some boat owners feel the best way to install is to remove all hardware (railings, seats, podiums, etc) from the pontoon deck and roll the flooring on in one solid piece. This leaves little need for trimming, cutting and other more time-consuming, complicated tasks. Not all steps are required depending on the installation method.
Step 1: Measure the Floor Area
Accurate measurements serve as the foundation for a successful marine vinyl flooring installation. DIY enthusiasts must measure each section of the boat floor with a tape measure, noting both length and width.
Proper measurements help calculate the total square footage needed for vinyl flooring materials.
Professional installers recommend adding an extra 10% to the total floor area measurement to account for mistakes or complex cuts around corners. A straight edge ruler helps mark precise lines on the floor surface, creating a detailed diagram of the boat's layout.
This step prevents material waste and ensures enough marine vinyl for the entire project.
Step 2: Remove Existing Carpet or Flooring
The removal of old boat carpet requires careful attention to detail and proper tools. A scraper helps lift the existing carpet from the floor surface while protecting the base material.
The process starts with disconnecting any wiring for gauges and switches to prevent damage during removal.
The old carpet needs complete removal using a combination of scraping tools and sanding pads. Marine professionals recommend working in small sections to maintain control over the removal process.
A razor knife aids in cutting stubborn sections of carpet into manageable pieces for easier removal. The surface must be free from all adhesive residue before installing new vinyl flooring.
The next crucial step involves preparing the cleaned surface for the new marine vinyl installation.
Step 3: Prepare the Surface (Clean and Sand)
After removing old flooring materials, proper surface preparation ensures optimal adhesion of marine vinyl flooring. Boat owners must clean the entire floor surface with a strong degreaser to remove dirt, grease, and leftover adhesive residue.
A scraper helps lift stubborn debris from the subfloor.
Sanding creates the ideal texture for new vinyl installation. Users need to sand the entire surface with medium-grit sandpaper until smooth. This step promotes better bonding between the subfloor and marine vinyl material.
A thorough vacuum and wipe-down removes all dust particles before moving forward with installation.
Step 4: Measure and Cut the Vinyl Flooring
Precise measurements form the foundation of a successful marine vinyl flooring installation. A straight edge helps mark accurate cutting lines on the vinyl material, while leaving extra material for proper trimming later.
The measurement process requires careful attention to corners, edges, and any unique boat features that need special fitting.
The cutting phase demands a sharp razor knife and steady hands to achieve clean, professional results. Marine vinyl flooring needs exact cuts to fit snugly around corners and edges without gaps or overlaps.
A proper cut creates a seamless look that enhances the boat's appearance and prevents water from seeping underneath the new floor covering.
Step 5: Apply Adhesive to the Surface
Marine-grade adhesive creates a strong bond between the boat's surface and vinyl flooring. A proper application requires spreading the adhesive evenly across the clean surface with a roller or flat tool.
The adhesive must cover every inch of the floor to prevent loose spots or bubbles from forming later.
The right amount of adhesive makes a huge difference in the final result of boat flooring installation. DIY installers need to spread a thin, even layer that sticks well but doesn't pool or create lumps under the vinyl.
The marine-grade glue needs 15-20 minutes to become tacky before laying down the new vinyl flooring material. Always check your adhesive manufacturer specifications. We recommend using AAT390 for best results.
Step 6: Install the Marine Vinyl Flooring
After applying adhesive evenly, the next crucial phase starts. The installer must place the vinyl flooring onto the prepared surface with careful precision.
The vinyl needs firm pressure during placement to create proper contact with the adhesive. A straight edge helps smooth the material from the center outward to remove air pockets. The installer must work section by section to lay vinyl carefully, preventing bubbles and wrinkles from forming.
A razor knife creates clean cuts around edges and corners for a professional finish. Most marine-grade adhesives provide enough hold on their own.
Step 7: Smooth Out Bubbles and Wrinkles (Optional)
This stuff may be needed for watertight products. Breathable products such as Flexa mesh, thick and thin backs do not.
Smoothing out bubbles and wrinkles marks a crucial step in marine vinyl flooring installation. A squeegee or roller helps remove trapped air pockets between the vinyl and the boat's surface.
The installer must work from the center of each section toward the edges in steady, firm strokes.
Professional results demand careful attention to bubble removal during this phase of vinyl flooring installation. The installer presses down with consistent pressure using the squeegee or roller tool.
This technique forces air bubbles toward the edges while creating a strong bond between the marine vinyl and the deck surface.
Step 8: Add Trim or Edging (Optional)
Marine vinyl flooring needs proper finishing touches for a professional look. Aluminum trim pieces create clean edges and protect the vinyl from wear and tear at high-traffic points.
The trim must match the boat's style and color scheme for the best results.
Proper installation of trim requires rivets or fasteners to secure each piece firmly. DIY installers should drill pilot holes through the trim and into the deck surface. The fasteners need proper spacing to prevent loose edges while maintaining a sleek appearance.
This final step creates a polished finish that boat owners will appreciate.
Quick Tips for a Professional Finish
Professional finishes require proper labeling of wiring connections before starting the installation process. DIYers must mark each wire's location with colored tape or tags to ensure correct reassembly later.
Special care around corners and edges creates clean lines and prevents future lifting of the vinyl flooring.
A straight edge tool helps create precise cuts in the marine vinyl, leading to seamless transitions between sections. The razor knife needs frequent blade changes to maintain sharp, clean cuts throughout the project.
Proper safety gear protects hands and eyes during installation steps. Customization options include matching trim pieces or decorative inlays to enhance the boat's overall style.
Conclusion
Marine vinyl flooring transforms boats with style and durability. DIY installation saves money while creating a custom look that matches personal preferences. The right tools, proper surface preparation, and careful attention to detail lead to professional results.
Boaters who follow these steps will enjoy their new flooring for many seasons to come.
FAQs
1. What tools do I need to install marine vinyl boat flooring?
Not all installation methods are the same and the tools will vary. You may need a razor knife, measuring tape, adhesive, and marine-grade vinyl flooring. Basic tools like scissors and a straight edge will also help create clean cuts.
2. How long does DIY boat flooring installation take?
A complete vinyl flooring installation typically takes 4-6 hours for an average-sized boat deck.
3. Should I remove old flooring before installing new marine vinyl?
Yes, remove all old flooring and adhesive residue for the best results. Clean the surface thoroughly and ensure it's completely dry before laying new vinyl boat flooring.
4. How do I ensure my marine vinyl flooring stays secure?
Apply marine-grade adhesive evenly across the entire surface and press the vinyl flooring firmly into place. Start from the center and work outward to prevent air bubbles and ensure proper adhesion.

Leave a comment
This site is protected by hCaptcha and the hCaptcha Privacy Policy and Terms of Service apply.