


9 Tips for Sewing with Clear Vinyl

Are you trying to sew with clear vinyl, but aren’t sure where to start? It’s a little different than sewing with other materials, so we put together some tips that should help you get started.
Some of the challenges you might face when sewing clear vinyl are cutting the vinyl, removing wrinkles from the vinyl, and feeding thread through the vinyl. We’re going to touch on these areas and a few others to show how you can overcome some of these challenges.
Sewing with clear vinyl doesn’t have to be difficult, and that’s what I’m here to help you with in this article. Now let’s go ahead and dive into our top nine tips to help you sew your bags, window panels and so many other fun projects.
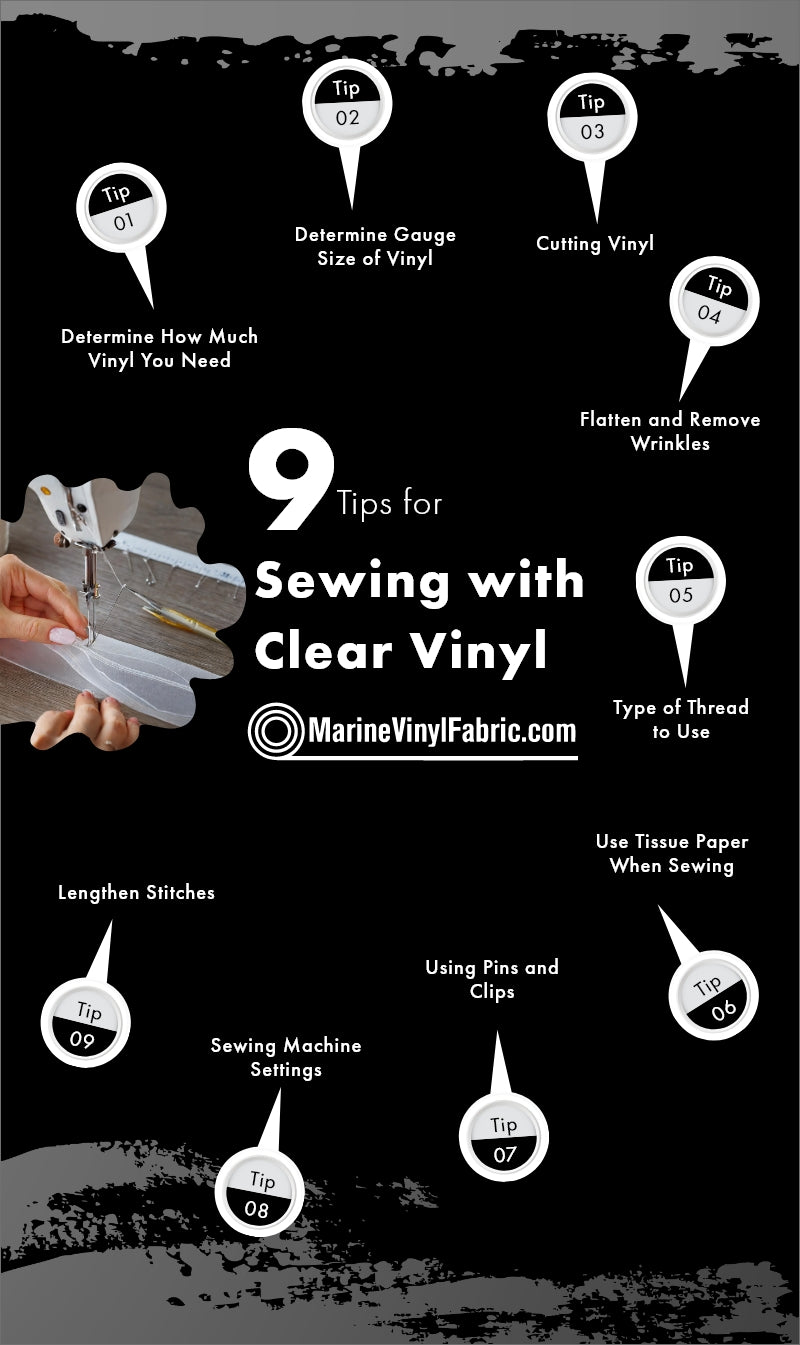
Tip #1 - Determine How Much Vinyl You Need
The first thing you’ll need to do is determine how much clear vinyl you’re going to be working with. If you’re only sewing a small amount, this shouldn’t be too difficult to determine.
If sewing the clear vinyl is part of a bigger project, then it might be beneficial to check out our clear vinyl project calculator to determine how much you’re going to need.
Now that you know how much clear vinyl you’re using, let’s go ahead and move on to our other tips.
Tip #2 - Determine Gauge Size of Vinyl
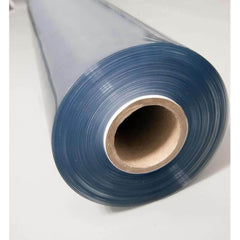
When working with clear vinyl, it’s going to be important to understand how thick you want the vinyl to be. Our clear vinyl (and most) use a gauge measurement to indicate thickness. The higher the gauge, the thicker the vinyl is.
It will be helpful to find a balance between the thickness you’re looking for, and choosing something that won’t be too difficult to sew with. The thicker the vinyl, the more difficult it becomes to actually sew with.
We carry 10 gauge all the way up to 80 gauge clear vinyl. I’d recommend using clear vinyl that is between 10 and 20 gauge for sewing. Any thicker than that will become a little too stiff to sew with. The 10-20 range will make it easier to sew with, but you still shouldn’t run into too many issues with wrinkles, since it’s still relatively sturdy.
Feel free to check out our clear vinyl samples to see what might work best for your project.
Tip #3 - Cutting Vinyl
There are a few different options you have when it comes to cutting the vinyl.
One option is just using regular fabric scissors to cut the vinyl. I wouldn’t recommend going this route for a few different reasons. It will be more difficult to make sure you get a nice, straight cut on your vinyl. The other main reason is that there’s a good chance that cutting through clear vinyl will dull your scissors over time.
The way I’d recommend cutting the clear vinyl is to use a matt, a ruler, and a rotary cutter. This is the best way to eliminate any errors from the process. It will be much easier to get a straight cut through your vinyl, and you won’t need to worry about dulling your scissors.
Although you’re going to have an easier time with the ruler and rotary cutter method, if all you have is a pair of scissors, you can still make it work. Just keep a steady hand, make the cut as straight as you can, and use the least number of cuts possible.
If you go this route you will want to make sure your scissors are very sharp and that your clear vinyl isn't too thick. Our thicker products like our 60 and 80 gauge can be harder to cut for some people if your scissors are not sharp.
Tip #4 - Flatten and Remove Wrinkles
Now you should have your vinyl thickness picked out, and you have the vinyl cut to size. Nice work! Now we’re going to move on to flattening and removing wrinkles in the vinyl.
If you’re using 10-20 gauge vinyl, you shouldn’t run into too many issues with the vinyl having a bunch of wrinkles in it. However, there may be a few areas that you’re looking to flatten and smooth out.
Here are three ways that you can remove wrinkles from your vinyl:
- Put it outside in the sun. The sun will help heat up the vinyl and remove the wrinkles.
- Use a hair dryer on low to medium heat. Make sure you don’t keep the hair dryer in one area for too long, and make sure the hair dryer isn’t too hot, or you could melt the vinyl.
- Put two pieces of cloth around the vinyl and use an iron. Again, be careful not to keep the iron in one place for too long. If the vinyl is thin, you run the risk of melting the vinyl.
Tip #5 - Type of Thread to Use
When you’re sewing with clear vinyl, there isn’t a specific type of thread that you need to use. Most threads should work, but it also depends on the thickness of the vinyl.
If your vinyl is relatively thick, I would recommend choosing a strong thread that isn’t too thick. If your thread is too thick, this could create some unwanted rubbing and friction.
Using 100% polyester thread is usually going to be a great option for sewing with clear vinyl. Marine Vinyl Thread is a great option as it also holds up great in outdoor environments.
Tip #6 - Use Tissue Paper When Sewing
You should be in a good position to get going on sewing with your clear vinyl now. Before you actually get started, I want to help you avoid an issue a lot of people encounter.
A big pain point people run into when sewing with vinyl, is that they run into issues feeding the thread into the vinyl. This is especially difficult with thicker vinyl. A nice “hack” to avoid this issue is to use tissue paper.
When you place tissue paper over the top and bottom of your vinyl, this helps feed the thread through the vinyl, and avoids the sewing machine getting stuck in one place. Once you are done sewing the vinyl, you can simply tear the tissue paper off and then you’ll be good to go.
Bonus Tip: Place Press and Seal on your machine. It will help prevent the clear vinyl from sticking.
Tip #7 - Using Pins and Clips
When sewing vinyl together, or sewing fabric to vinyl, you’re going to need to hold the fabric and vinyl together. You have a few different options that work here.
There are a bunch of different options to choose from including clothespins, binder blips, fabric clips, paperclips, etc. Really anything that will hold your fabric and vinyl together will work.
The only thing to keep in mind is that unlike regular fabric, pins will leave holes in your vinyl. Most people would recommend using clips to hold the pieces together for this reason. If you have clips around, they will be your safest option to hold the material together. However, if you can pin pieces of the material that won’t be showing in the end, then you won’t need to worry about the holes the pins would create.
Tip #8 - Sewing Machine Settings
When sewing with clear vinyl, there are a few setting adjustments that you may need to make to your sewing machine to be sure you get the end result you’re looking for.
Vinyl is going to react a little bit differently than when you’re sewing regular fabric. Here are two settings to take a look at before getting started:
- You should be using a relatively sharp needle. Vinyl is a thicker material than fabric, so using a thicker needle ensures that it can get through the material. Leather and denim needles work great with vinyl.
- Using the right presser foot can make things much easier. A few options include a walking or teflon foot. These will help the fabric slide through your machine easier. A basic presser foot can certainly work, but it may be more difficult to slide the material through your machine.
Tip #9 - Lengthen Stitches
One last tip that can save you a headache or two would be to lengthen your stitches before you get started. One issue that a lot of people run into is that they end up stitching too close together, which can result in tears in the vinyl.
I would recommend switching the stitch length to 3.0 before getting started. This will keep the stitches further apart and avoid tearing. The reason the tearing occurs more frequently in vinyl material is because the needle holes stay in the material after stitching. If those holes are too close together, that’s where you run into issues. The holes can cause a perforation that will eventually result in tears in the vinyl.
If you’re using tissue, it will also be easier to remove the tissue when you are done stitching. The holes will be further apart allowing you to more easily remove the tissue.
Quick Recap
With these nine tips, you’re going to avoid some of the big issues most people face when sewing with clear vinyl:
- Determine how much clear vinyl you’ll need. Using our material calculator can help you determine this.
- Determine gauge size of vinyl. The higher the gauge, the thicker it will be. I’d recommend sewing with 10-20 gauge vinyl.
- Using a rotary cutter and ruler will be the easiest way to cut the vinyl.
- Putting your vinyl in the sun or using a hair dryer on low to medium heat is a good way to remove wrinkles.
- A strong, 100% polyester thread works great for sewing clear vinyl.
- Using tissue paper can help feed the thread through the vinyl.
- Using clips to hold the material together will likely be a better option than pins, so that you avoid creating holes in the vinyl.
- Using a sharp needle and a teflon foot will make the process easier.
- Lengthen the stitches to 3.0 to keep the holes further apart and to avoid tearing.
If you have any questions or need further guidance on your clear vinyl journey, don't hesitate to reach out to the experts at MarineVinylFabric. We're happy to help in any way we can. You can find our contact information on our Contact Us page, but for your convenience, you can also reach us directly at (800) 471-2092 Don't hesitate to get in touch!


1 comment
Thanks for your tips.
Ruthie Lawson Bynum
Leave a comment
This site is protected by hCaptcha and the hCaptcha Privacy Policy and Terms of Service apply.